Project Currently In Progress
Tipple Warining Light
Tutorial
This project came about as part of my desire to learn Blender, and in an effort to get back up to date with the latest asset creation standards.
Try Our New Dark Mode
Series 3 BTC Tipples
Tipple Warning Light
Tutorial
While all of the BTC Series 3 Tipples will work as designed when it comes to loading coal without the warning lights, I recommend that you take the time to learn how to set up the warning lights we have created to extend the visual interest of our tipples. On this page I will go into detail with regards to the assets used for the warning lights and on the ways the lights can and probably should be set up in surveyor.
Please note: This tutorial is a “Work In Progress” and I intend to refine some of its stages as required. I will also be adding extra sections as I feel that they are needed to explain how different tipple styles need some extra steps.
Cheers
Bondy
…
Step 1 Choosing and Placing the Tipple
Setting up the Tipple Warning Lights is by no means difficult there are just a few steps that you need to learn and once you are comfortable with them the set up process should only take a couple of minutes.
So while this might seem obvious the first step is choosing and placing the series 3 tipple that you want to use.
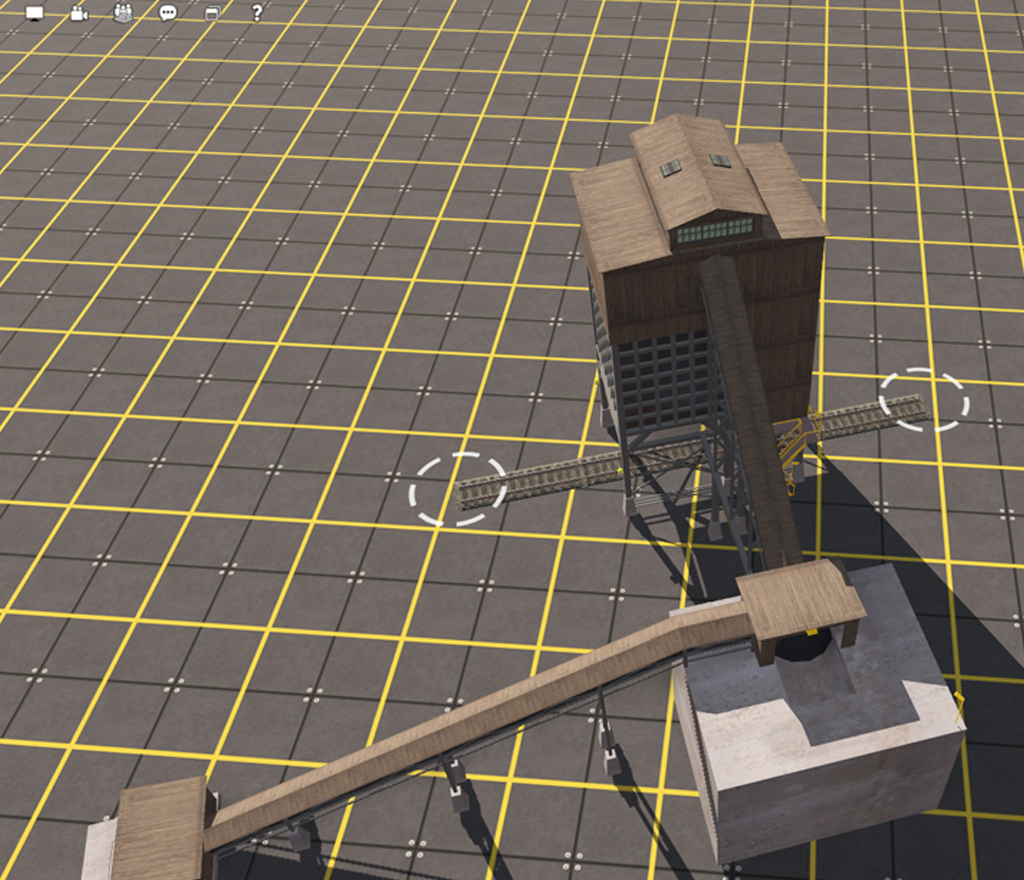
For this tutorial I have chosen the (BTC Tipple 3S-1A-FR-RD)
Because this tipple only uses one set of warning lights it is one of the easiest to set up but I will add extra tutorials for each style of tipple I make available.
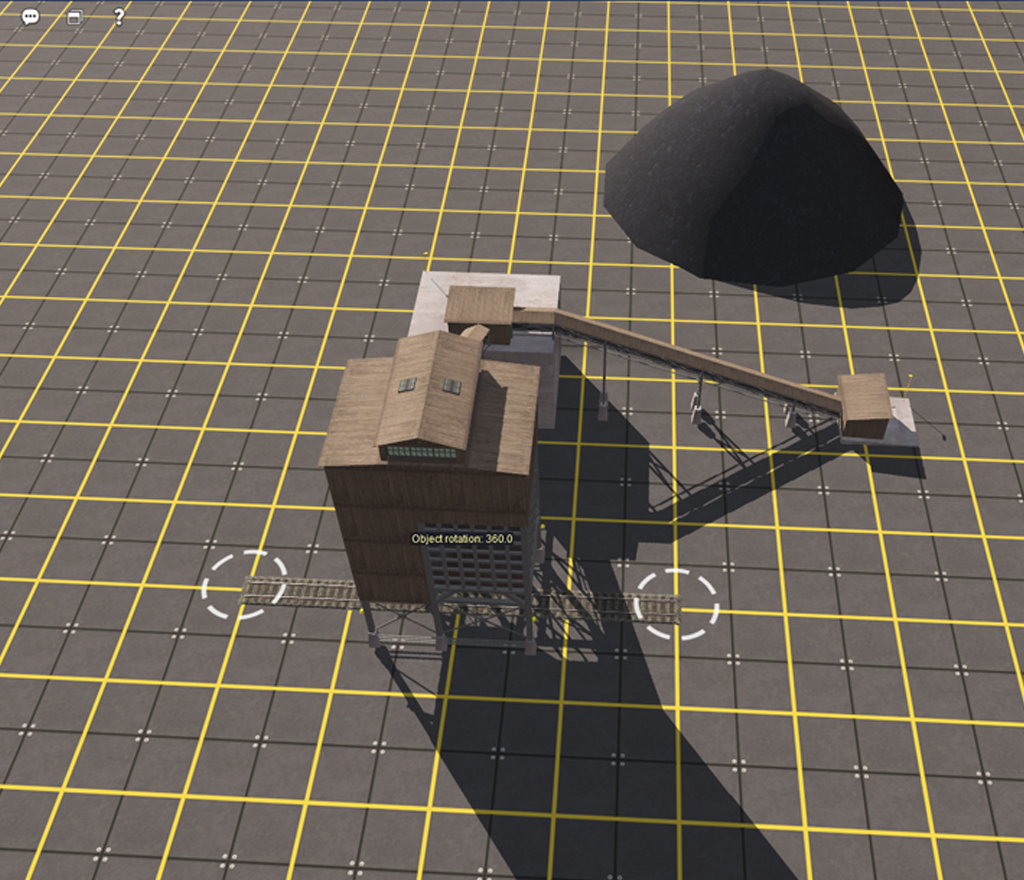
To keep things simple I have oriented it at 0 or 360 degrees.
Its important to realise that for single hopper tipples the front is considered the end with the steel cage visible over the hopper. With all tipples the connection point for the “Attachment Tool” will always be on track one (1) and at the front of the tipple.
It is worthwhile noting that this tipple is actually ready now to connect to the rest of your route and it would perform perfectly as a coal tipple, although I would probably set its options now and give it an appropriate name.
Step 2 Setting Up the Attachment Tool
Step 2 is probably the key to setting up the tipple warning lights, it involves selecting the correct Attachment Tool (in this case and for all Single Hopper Single Track Tipples) the
“BTC TWL 3S-AT-1A”.
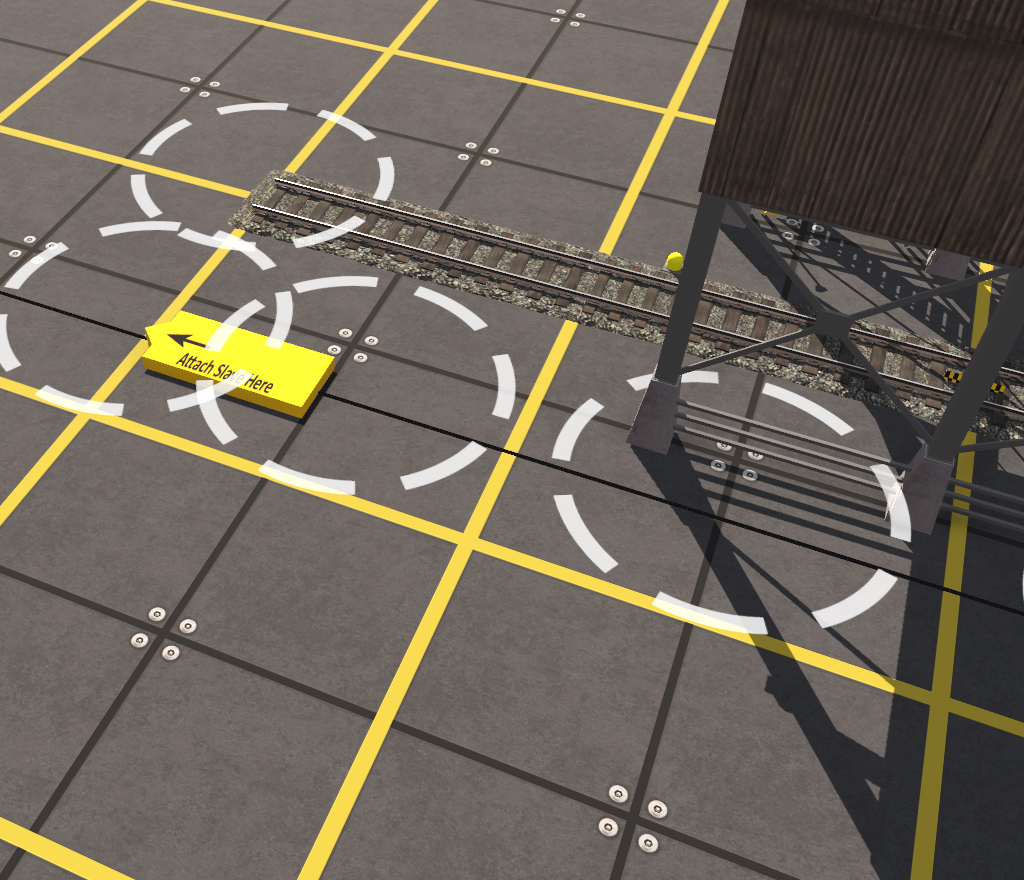
This tool is primarily used to perfectly align the warning lights themselves, but it also gives you an ideal point to place the required ATLS Slave and an obvious point to connect it to the warning light asset.
Adjust the “Attachment Tool” so that it is oriented to the same angle as the tipple you are setting up. Technically you have a choice now, you can go through the next few steps without connecting this tool to the tipple. If you choose to do the next steps away from the tipple please note that the finished “Attachment Tool” with the other assets and connecting invisible track in place will all move as one piece.
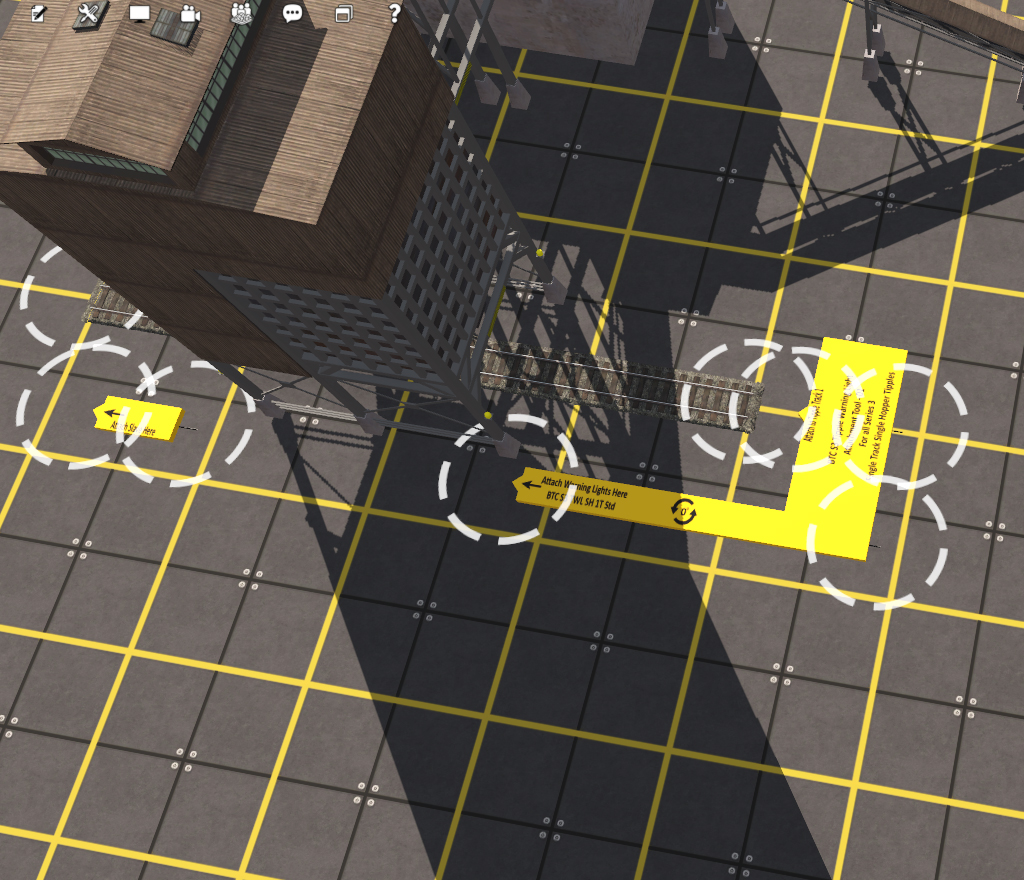
For the rest of this tutorial I am going to show you the way I set up these warning lights so my next action would be to connect the “Attachment Tool” to the tipple.
Once the “Attachment Tool” is aligned to the tipple connecting it is really simple, just slide the tool toward the track one (1) connection point at the front of the tipple and once it is close enough it will automatically snap itself to the track.
NB: Be aware that the “Attachment Tool” like all the other assets in the “Tipple Warning Lights” system is visible in surveyor only, it is not visible while driving a session in Trainz.
Step 3 Setting Up the Warning Lights
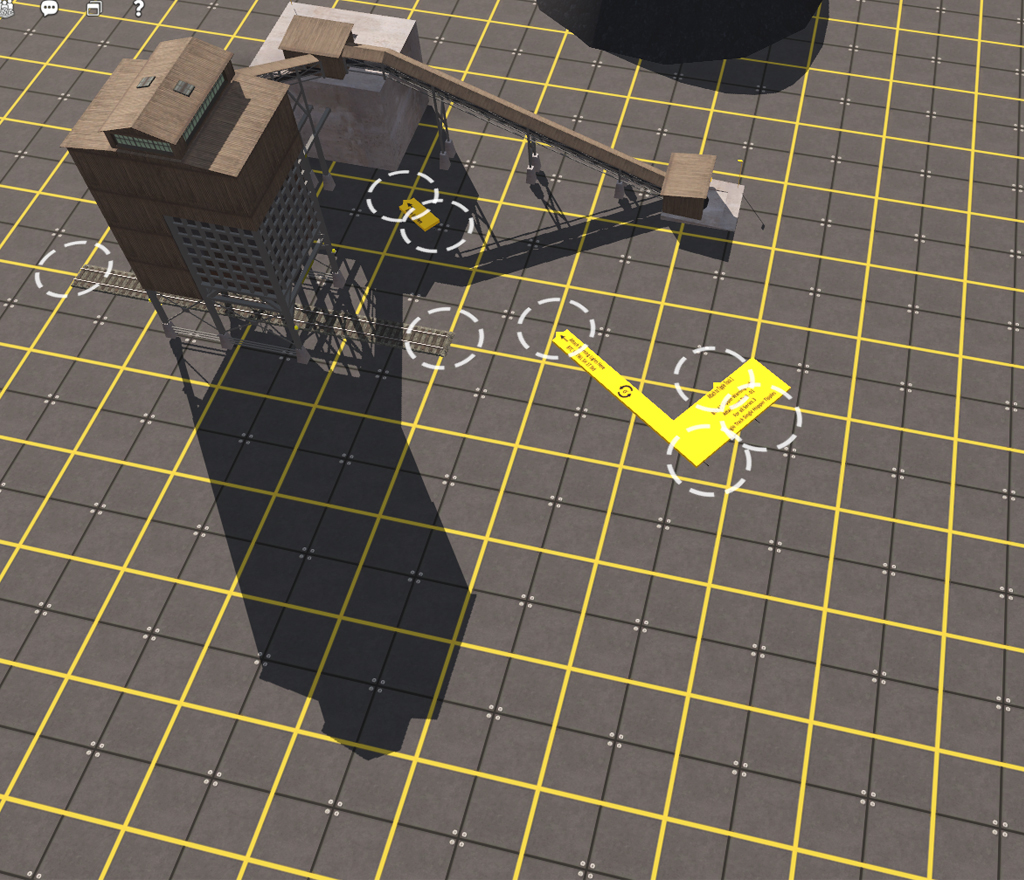
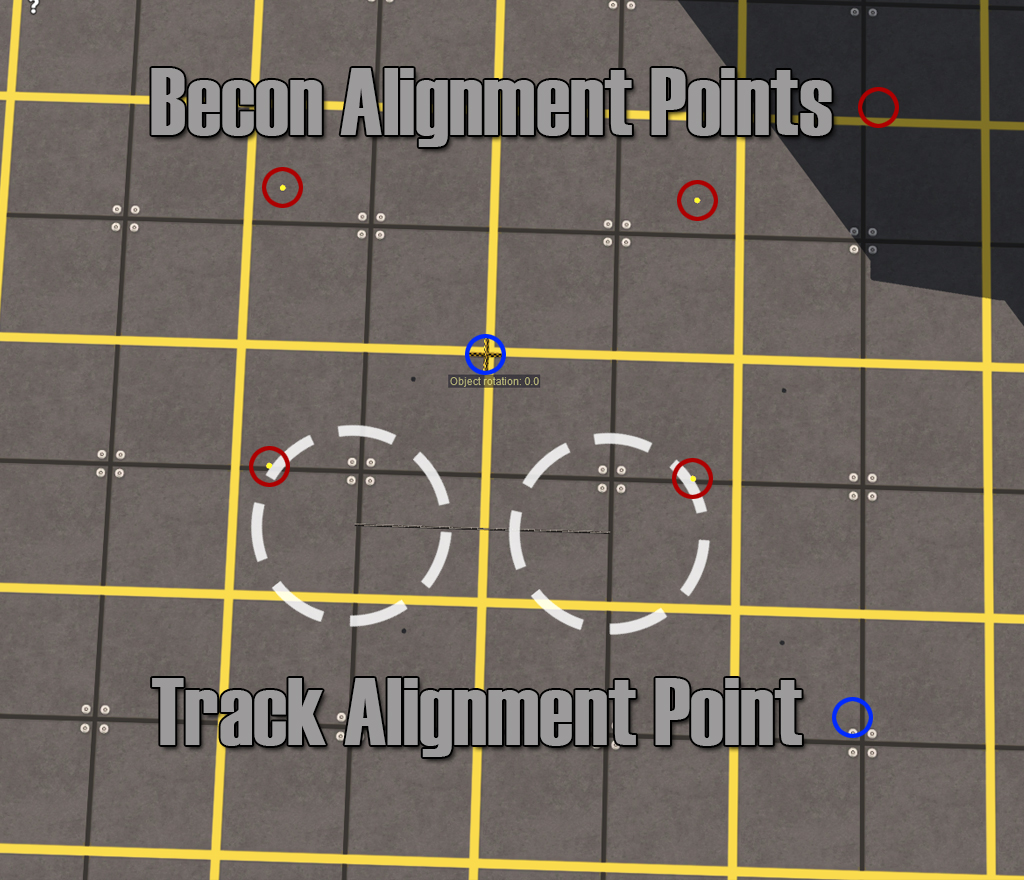
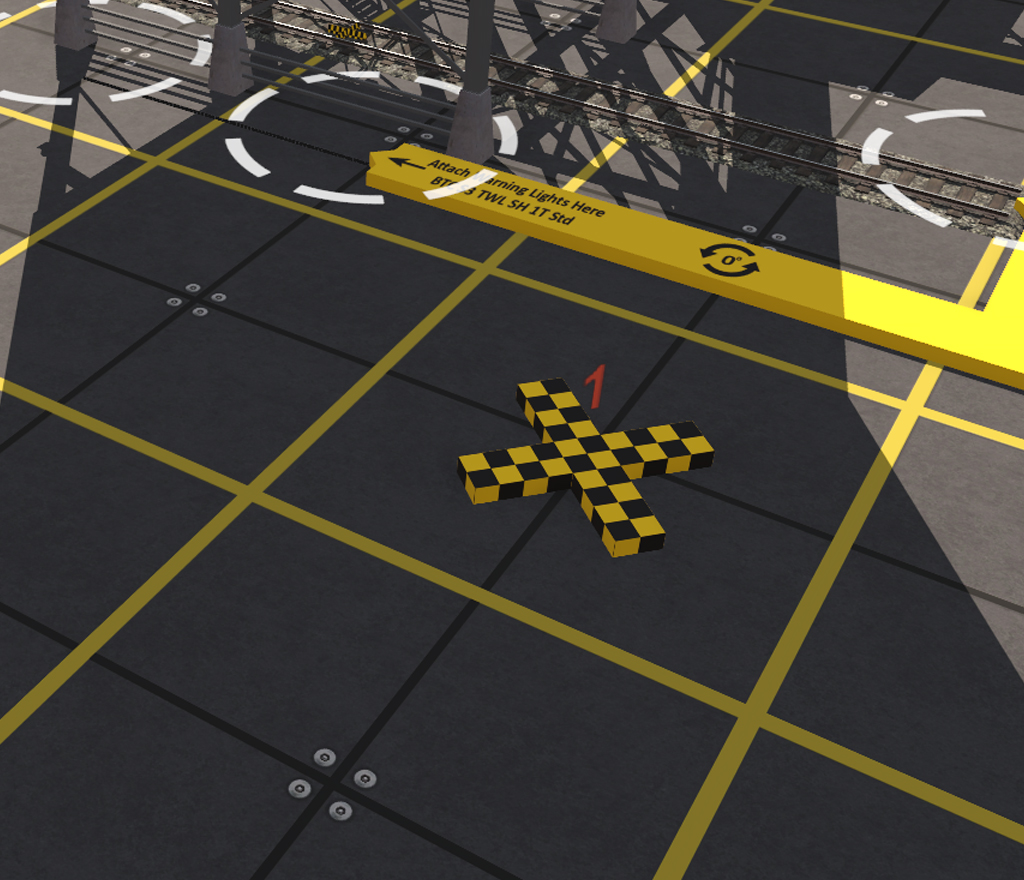
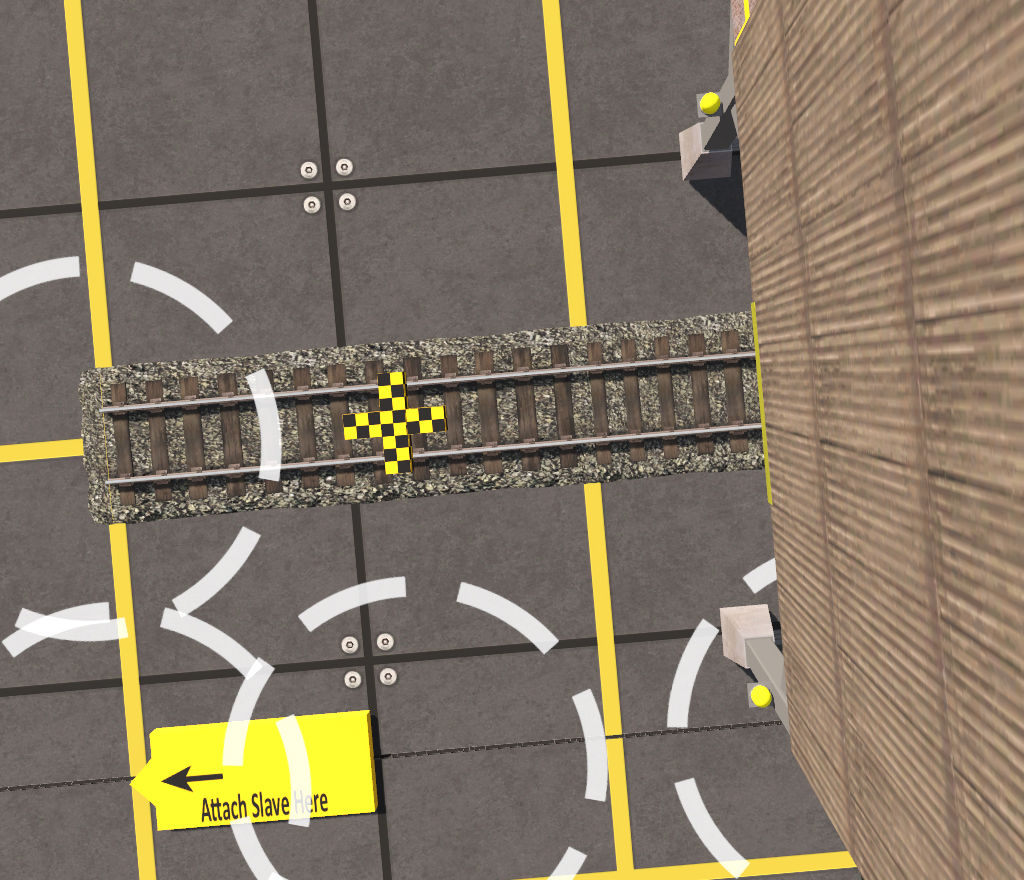
It’s now time to connect the warning lights to the attachment tool, but first lets look at the elements of the warning lights asset. There are only 3 components all of which are only visible in Surveyor
1 – There are the four beacon alignment points which are hidden within the beacons when connected.
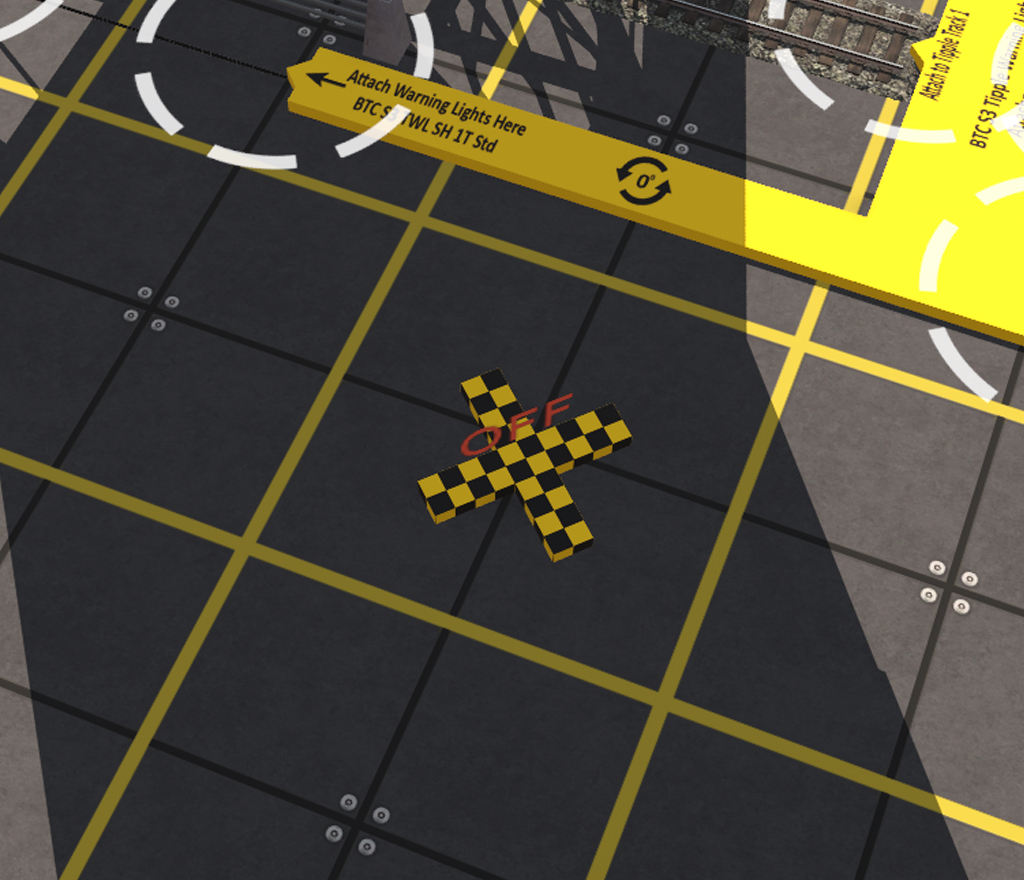
2 – There is the track alignment point the black and yellow checkered cross in the middle.
3 – The short section of “Invisible Black Wire BTC”: and this is what we will use to do our connections.
The track connection on the right snaps to the “Attachment Tool”.
The track connection on the left will be used to join to an ATLS Slave.
Until you get comfortable using the warning light assets the beacon alignment points and the track alignment point can be used to confirm that the warning lights asset has been correctly aligned with the tipple after connection.
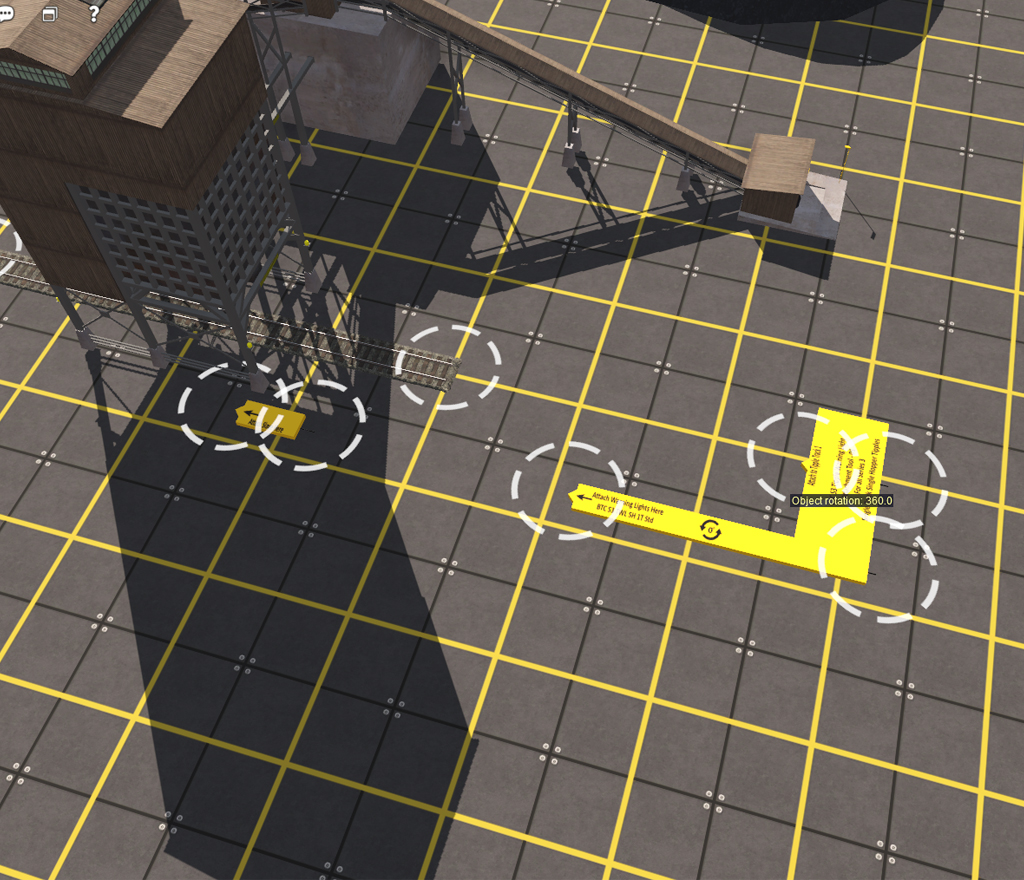
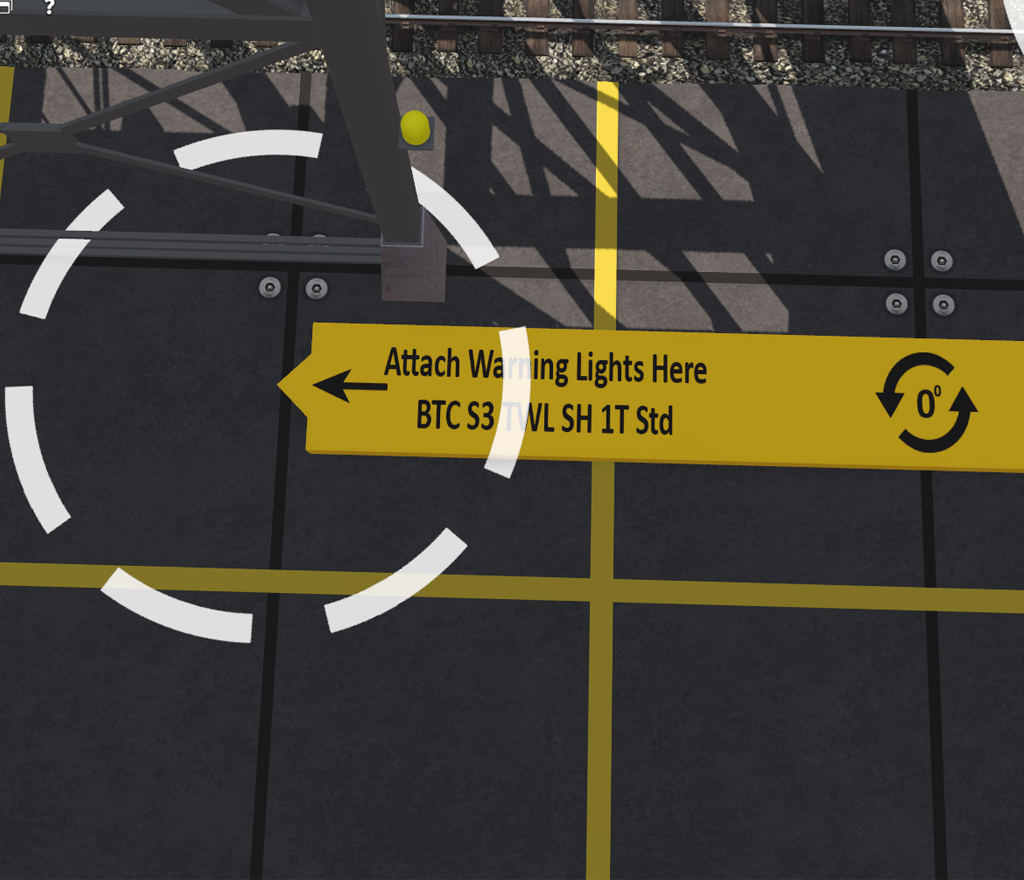
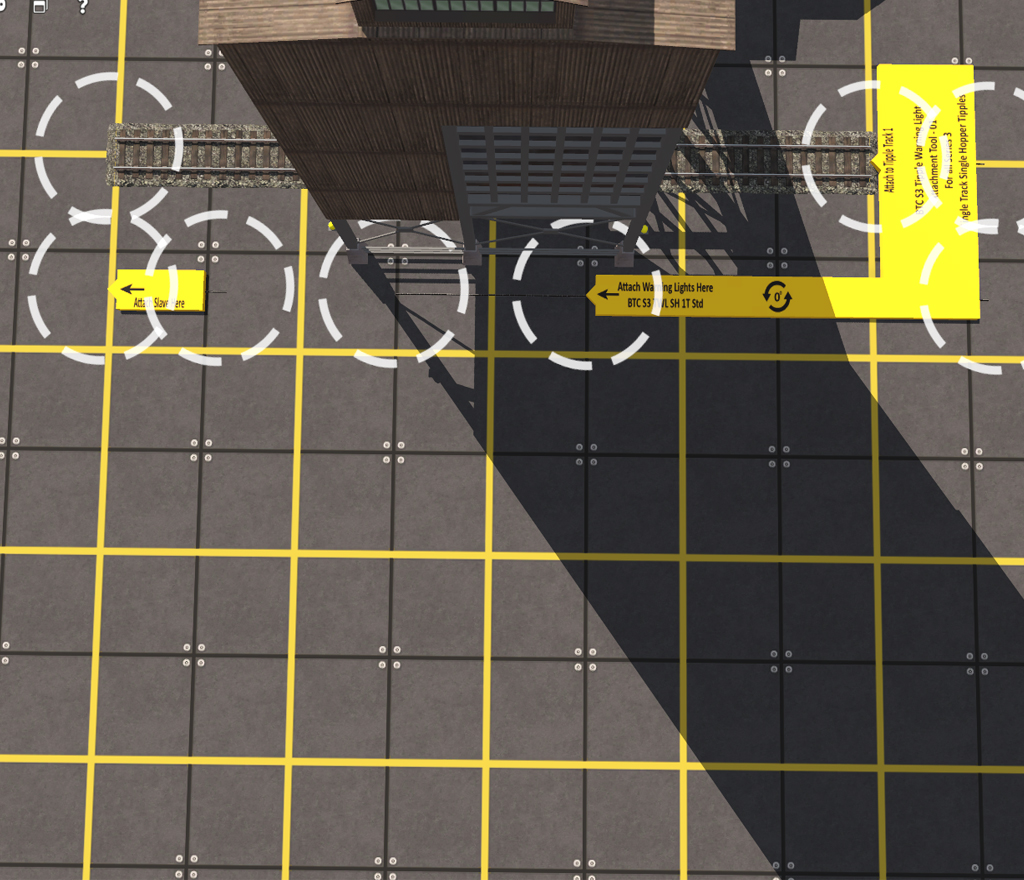
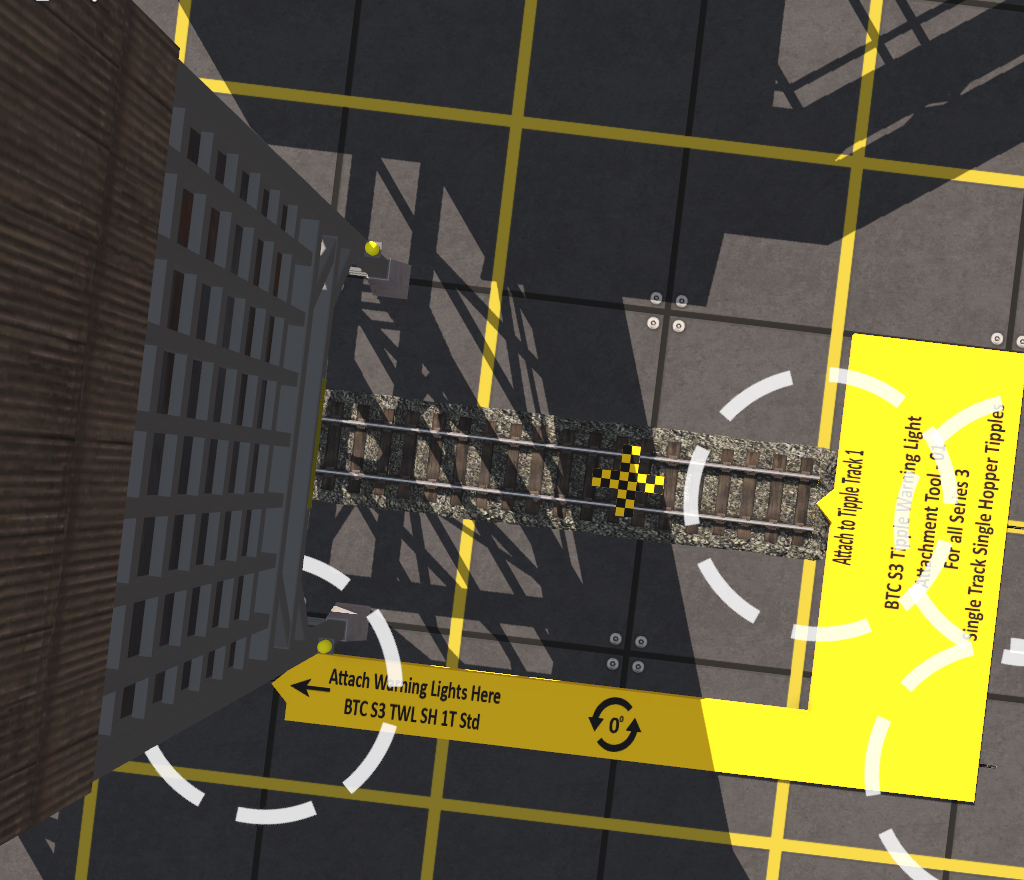
With the “Attachment Tool” connected to the tipple it is now time to set up the actual warning lights asset all of the attachment tool assets have points marked where the lights connect. Please note many tipples use more than one set of warning lights.
The 0 degree symbol indicates if the warning lights need rotated differently to the attachment tool. 0 means set the lights at the same angle.
So with the “BTC S3 TWL SH 1T Std” placed, notice that I have rotated it to the same angle as the attachment tool in this case 0 degrees.
It’s important to realise that with very little mass in the warning light assets the yellow and black checkered cross in the middle is the best point to use for editing or moving the lights. This asset looks really simple but most of what is happening here is because of the scripting.
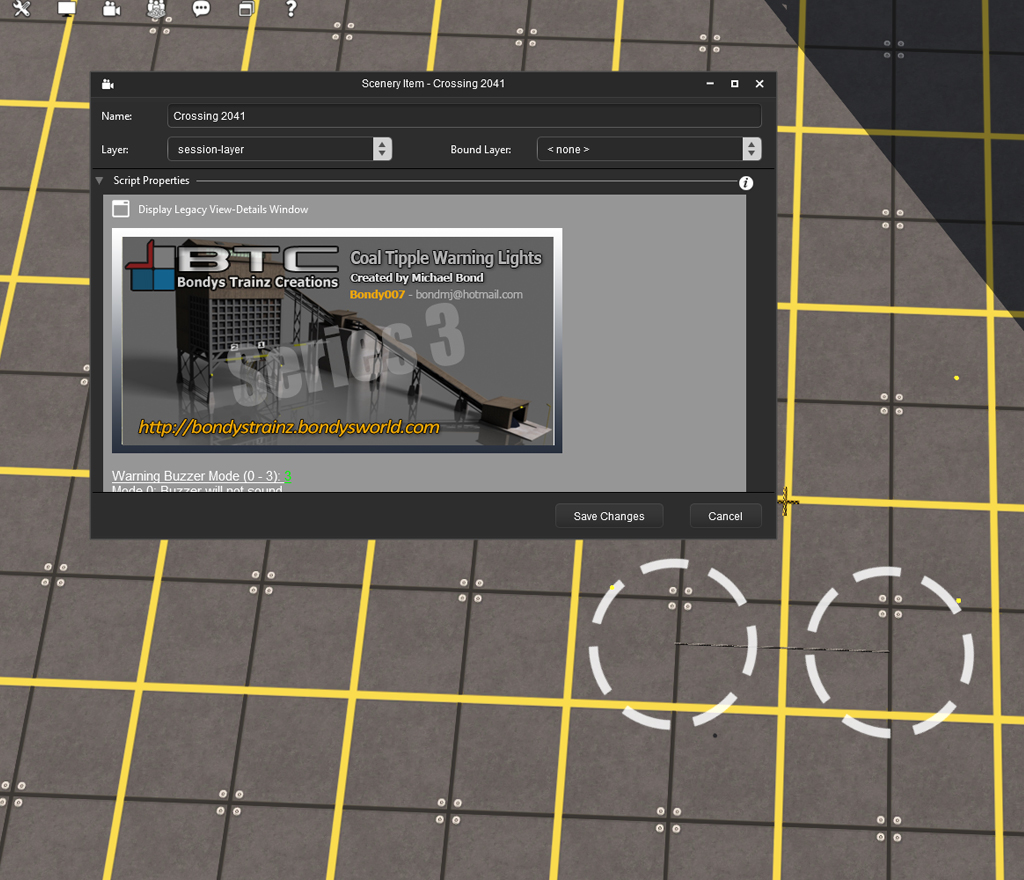
Configuring the warning lights is simple there is only one option setting that you may want to change and that is the warning buzzer mode.
There is no need it change the asset name, and I am going to assume that you already know how to use and set up layers, but in most situations there should be no need to change layer either.
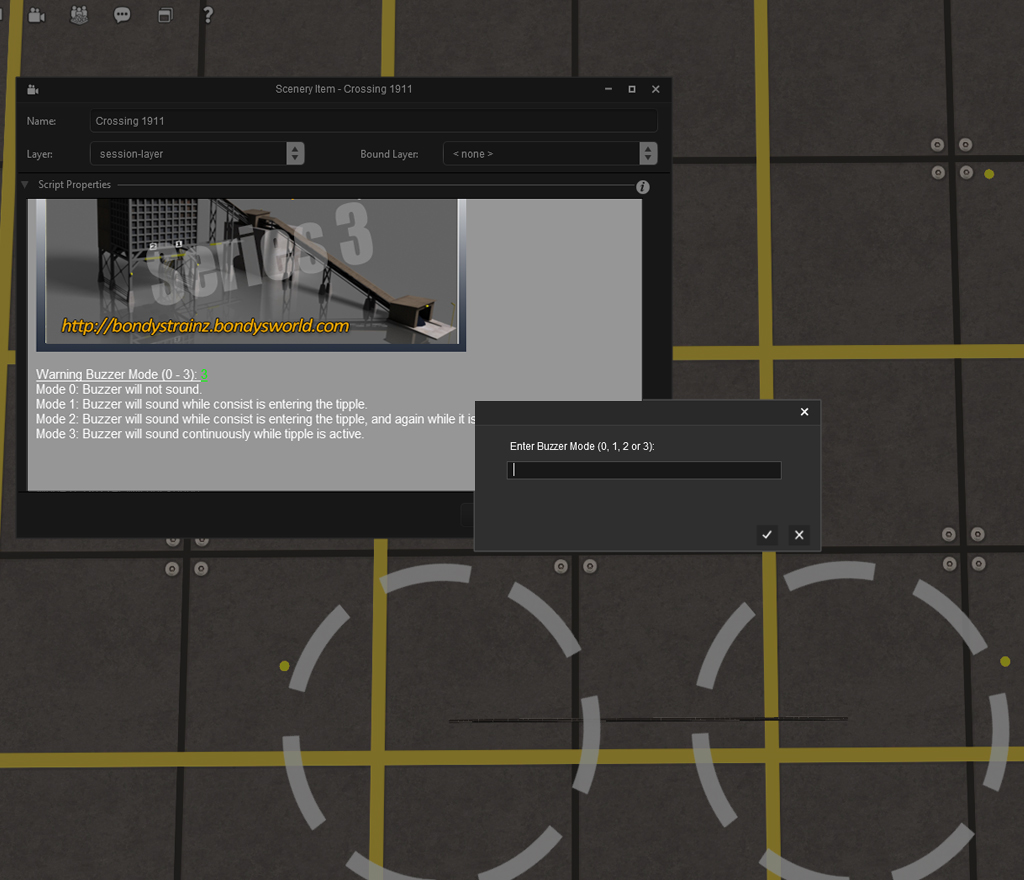
Configuring the “Warning Buzzer Mode”
The buzzer has 4 options
Mode 0 – Buzzer will not sound
Mode 1 – Buzzer will sound while consist is entering the tipple
Mode 2 – Buzzer will sound while consist is entering the tipple, and again while it is leaving
Mode 3 – Buzzer will sound continuously while tipple is active
Clicking the green number will open a dialogue box where you can set the mode you want.
Default is Mode 3
The warning lights assets are easy to connect, they also use the track snapping facility. The connection on the attachment tool is well marked and will snap to the track end point on the right side of the warning light asset. Once joined the lights will be aligned to the tipple.
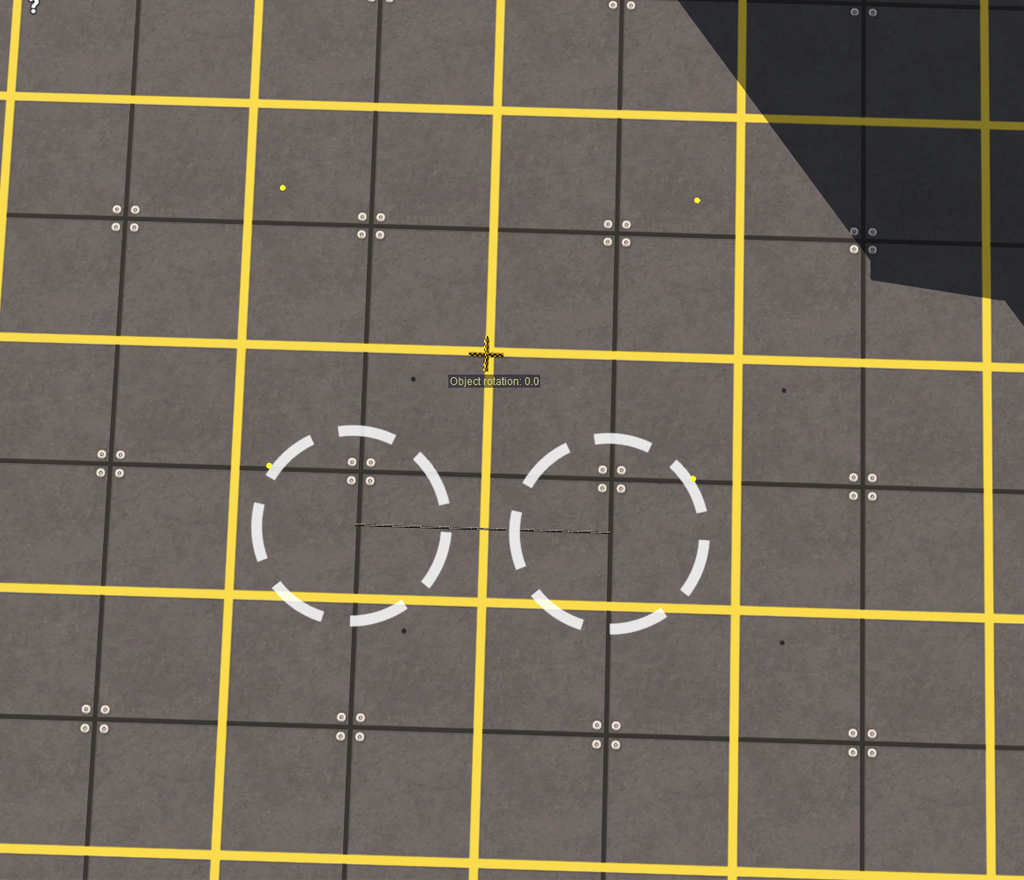
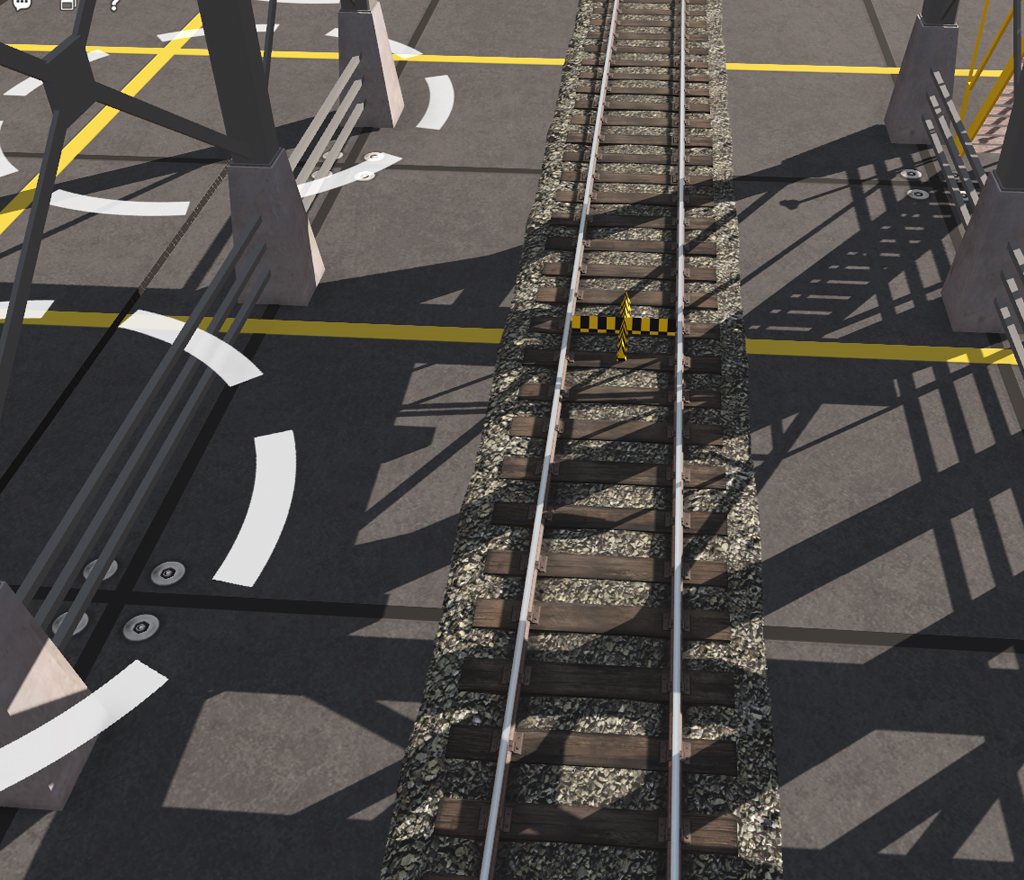
Until you are comfortable you may want to check that your warning lights are correctly aligned. The first and easiest way to do this is by checking the location of the track alignment point, it should be sitting directly in the center of the tipple and exactly between the two rails.
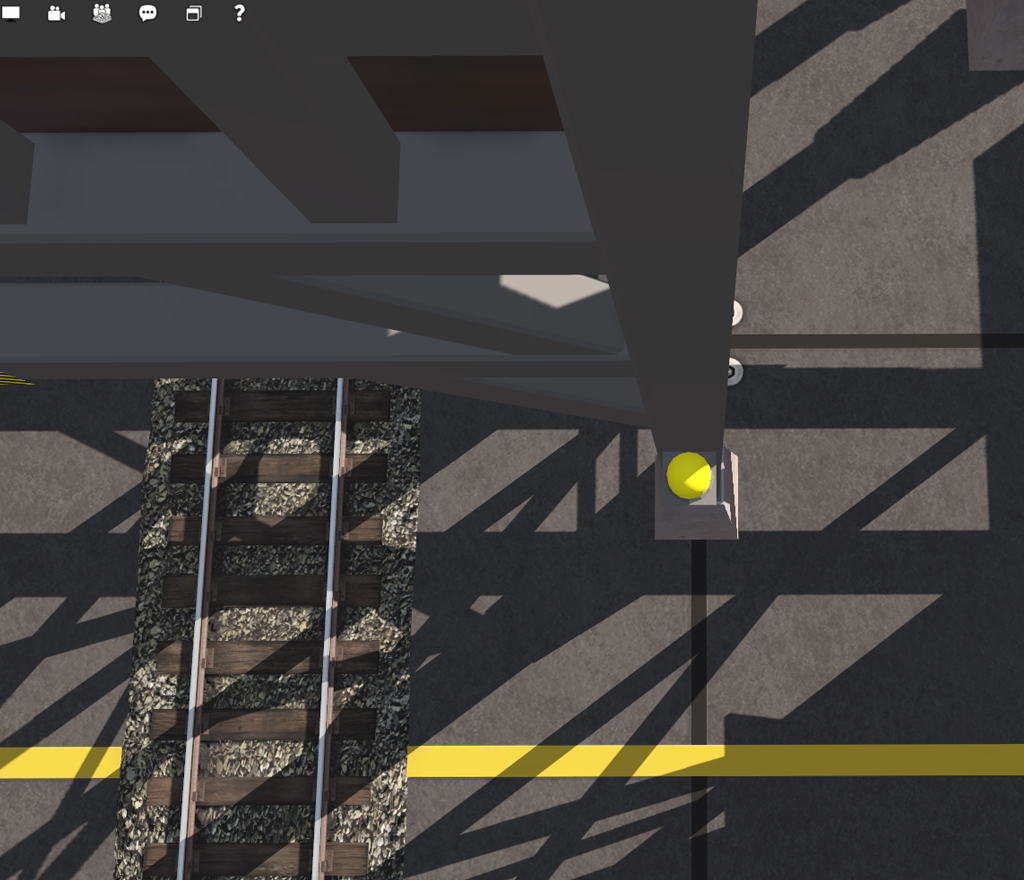
The beacon alignment points are also a good secondary way to make sure your alignment is spot on, if you have connected the lights correctly and the alignment is good you will not be able to see any of the yellow disks that denote the position of the flashing lights.
The next three (3) steps involve the ATLS components which make the whole “Tipple Warning Light” system work and at this point I feel it’s only fair to give credit to the original author
The ATLS system was designed and coded by Trainz user – boat (76656) – www.boatztrainz.co.uk
I have decided to create some simplified versions of (boats) ATLS assets specifically for the BTC Tipple Warning Lights, and these are the assets I will be using in these steps. While boats assets are amazing they have so much functionality built in that they are in my opinion a little overkill for setting up a simple crossing asset, so I would recommend using the BTC versions of the assets which are somewhat simpler.
Step 4 The ATLS Controller
Choose your ATLS Controller
and place it relatively close to your tipple.
I recommend the simplified BTC Version.
BTC TWL ATLS Controller
<kuid2:160942:31277046:1>
boats – ATLS Controller TRS19
<kuid2:76656:500010:21>
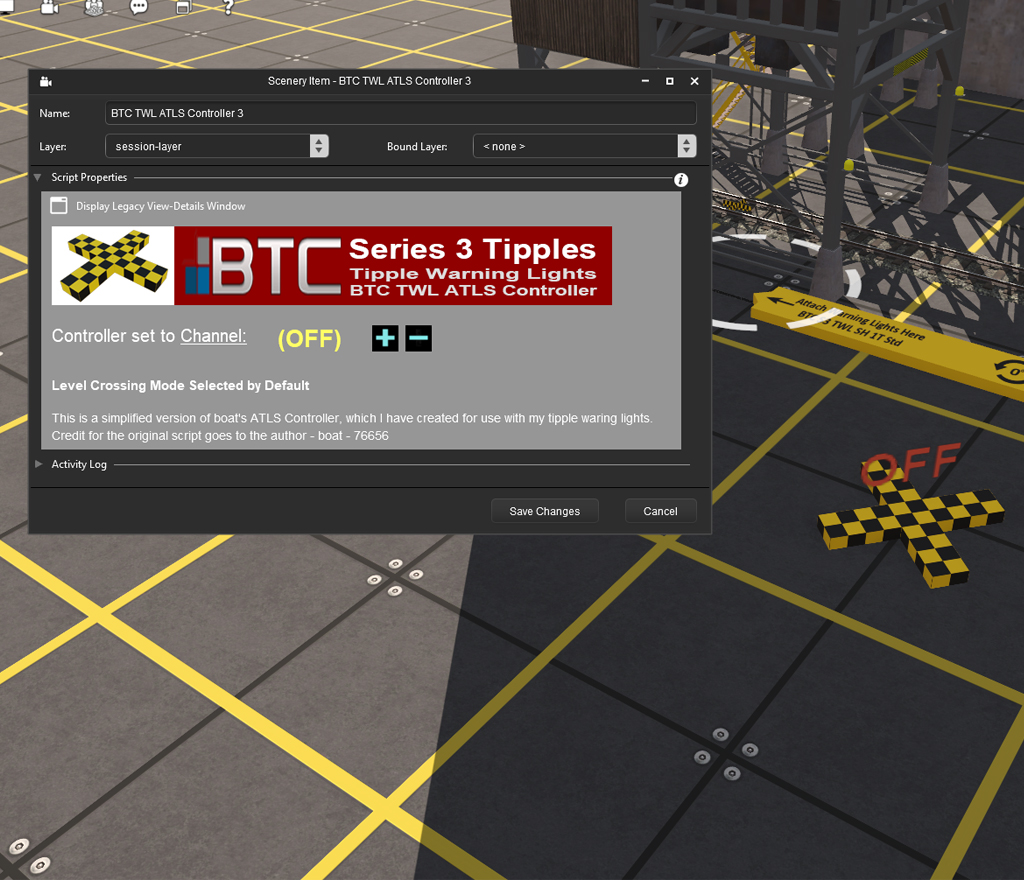
Assign a channel to this controller.
Use the “Edit details” button to open up the controllers options dialogue panel. The only important line is the one that says
“Controller set to Channel: (Off)”
Take note of the plus and minus sign.
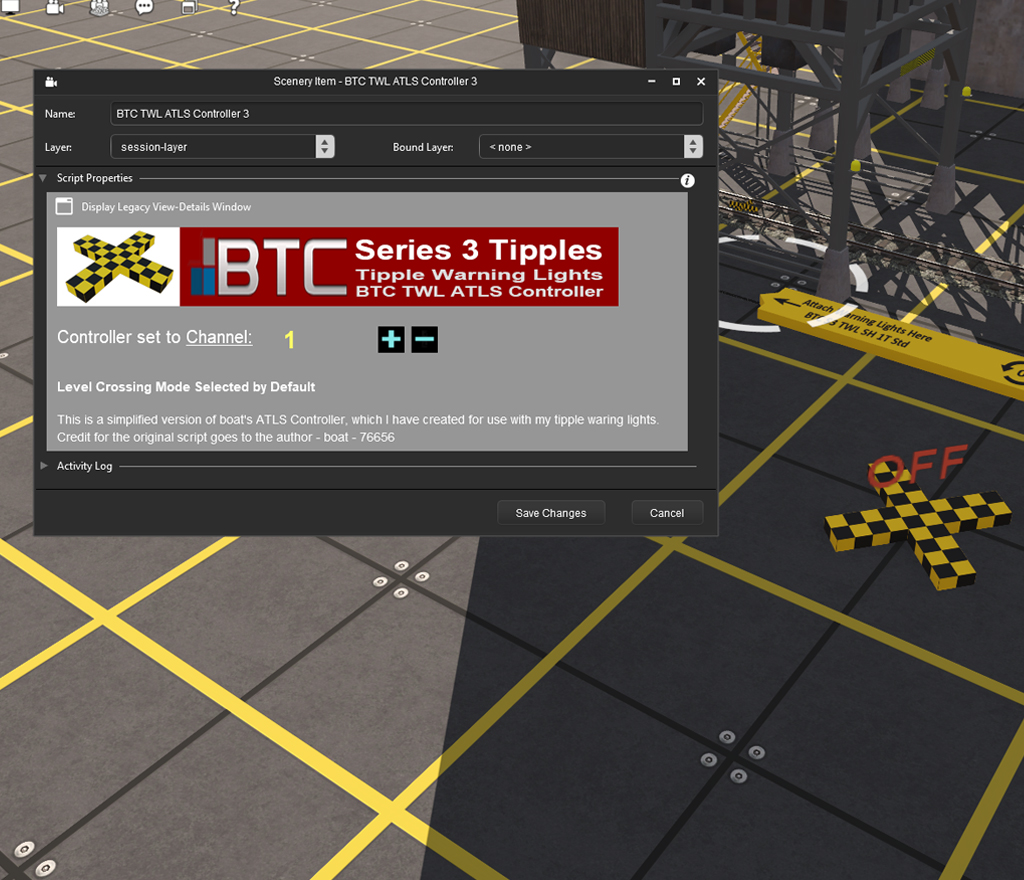
Clicking once on the plus sign will assign the first available channel number, depending on how may other controllers your route is using.
This number must be used on all ATLS assets related to this set of warning lights.
This means some tipples will require more than one controller.
Once you have chosen the controllers channel and closed the dialogue the controller will look just like the one above.
Please Note: You can see the channel number displayed at the top at the top of the asset.
Step 5 The ATLS Slave
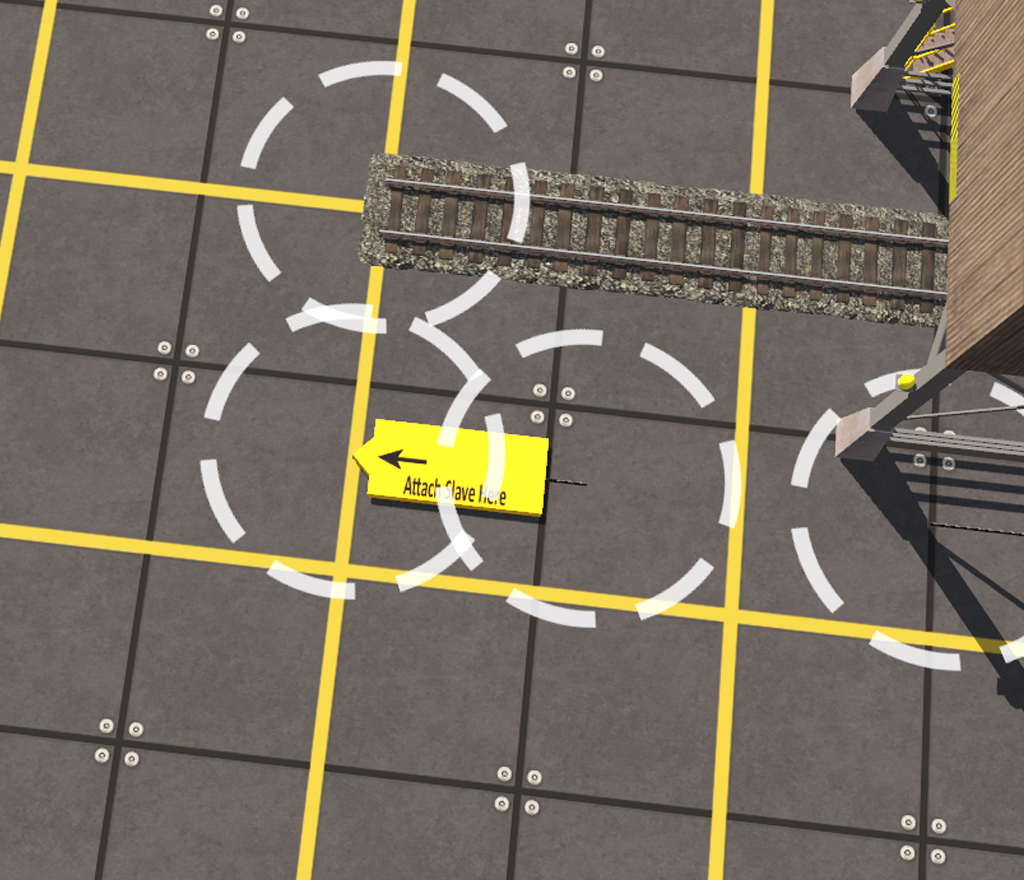
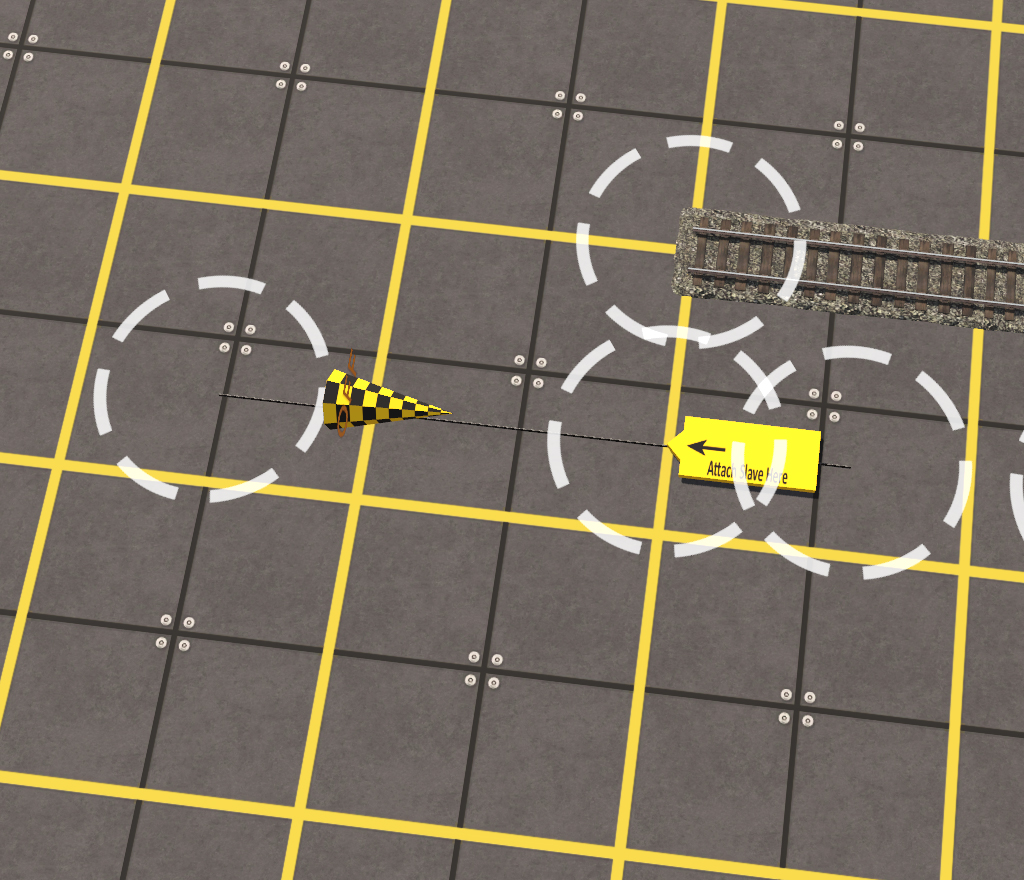
The next ATLS component required is the “Slave”, first locate the attachment point, it is at the back of the tipple at the end of the “Attachment Tool”.
Note that it has two (2) Track end points we will use both of them. One for the slave and one connecting back to the warning lights.
Choose your ATLS Slave.
I recommend the simplified BTC Version.
BTC TWL ATLS Slave
<kuid2:160942:31277047:1>
boats – ATLS Slave(TF) TRS19
<kuid2:76656:500012:20>
There are two ways to connect the slave but I will explain my preferred method.
Rotate the slave to the same angle as the attachment tool this asset will also use the track snapping facility.
I will detail the second way later.
Once rotated the slave can be snapped to the attachment tool. I prefer this method because once connected the “Attachment Tool” the “Warning Lights” and the “Slave” can be moved together.
And using the BTC TWL ATLS assets means they all use the same angle.
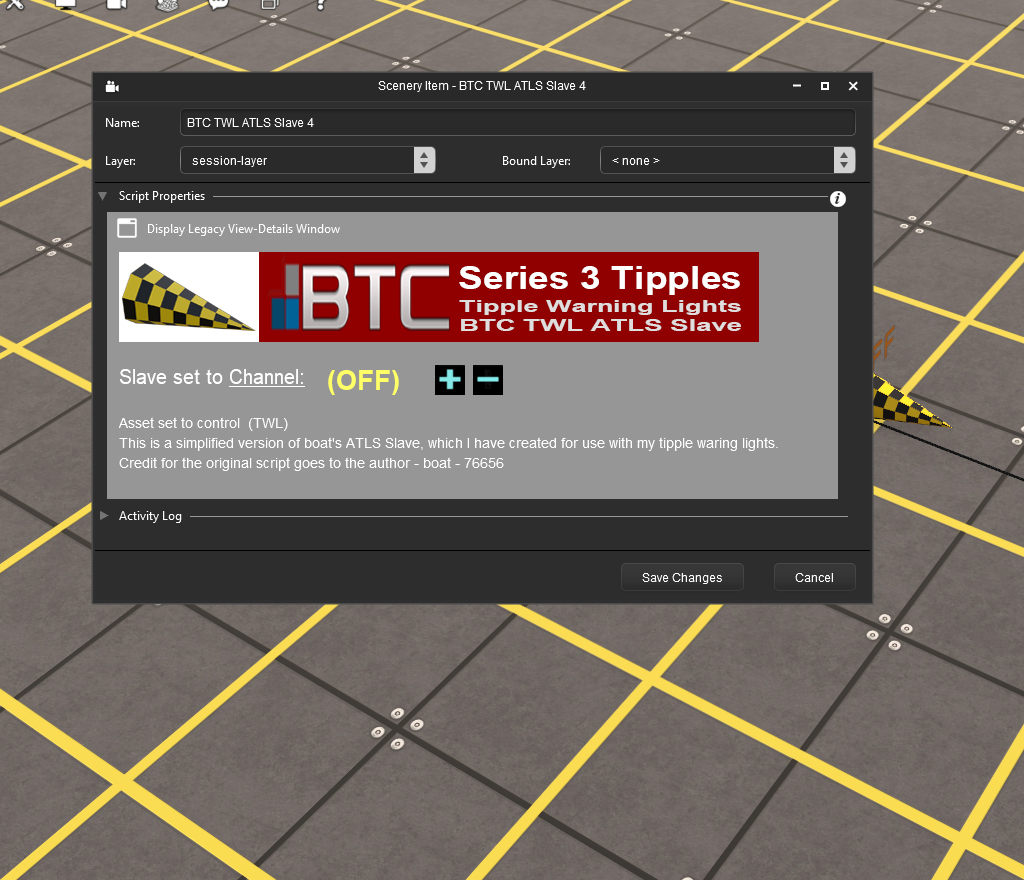
Assign the channel to the slave.
Use the “Edit details” button to open up the controllers options dialogue panel. The only important line is the one that says
“Slave set to Channel: (Off)”
Take note of the plus and minus sign.
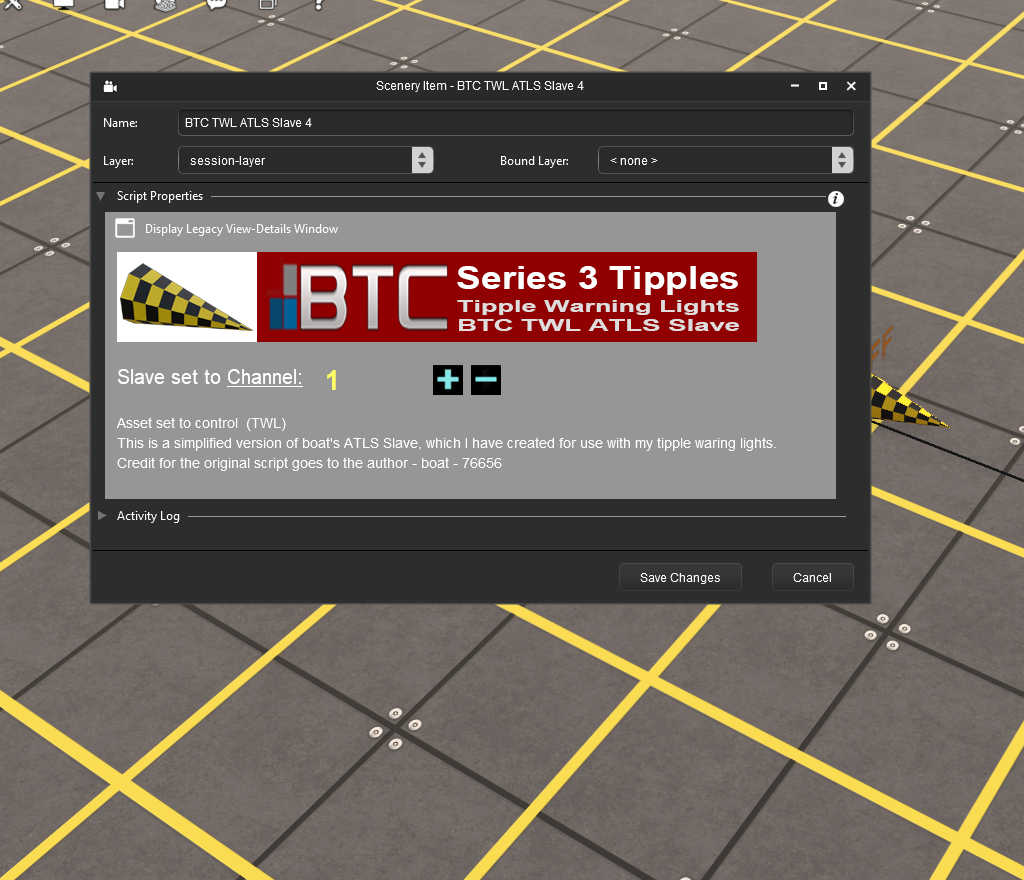
The channel for the slave must be the same as the controller you set up for this set of warning lights use the plus sign until the channel number matches that of the controller.
This number must be used on all ATLS assets related to this set of warning lights.
Once you have chosen the slaves channel and closed the dialogue the slave will look just like the one above.
Please Note: You can see the channel number displayed at the top at the top of the asset.
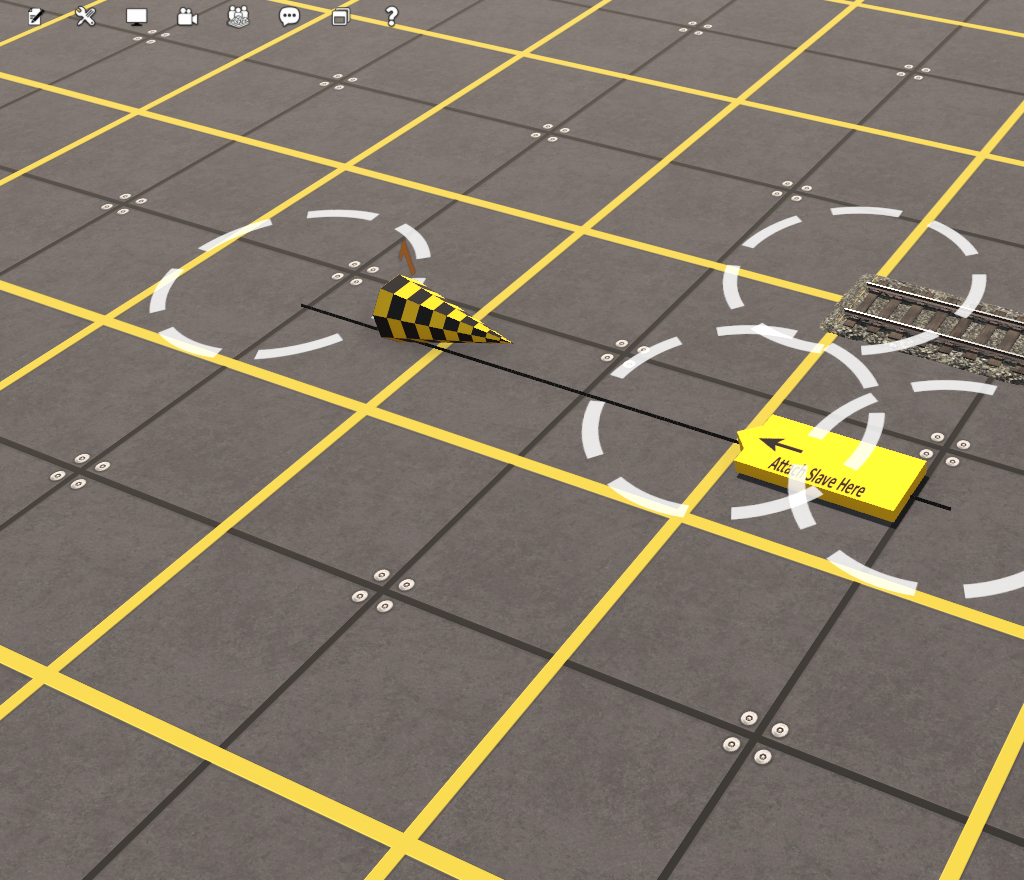
All that’s left to do to make the slave function is use a short length of invisible track to connect the slave to the warning light asset.
The image above shows what that should look like once the connection is made.
Step 6 The ATLS Triggers
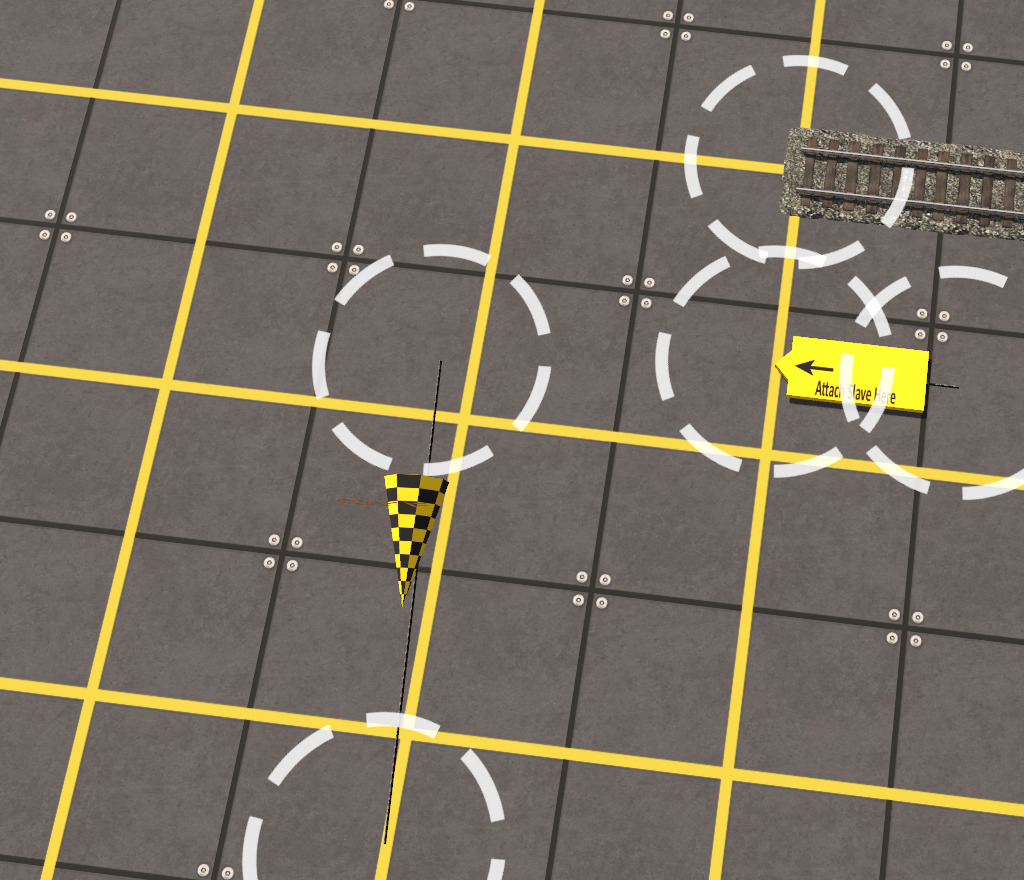
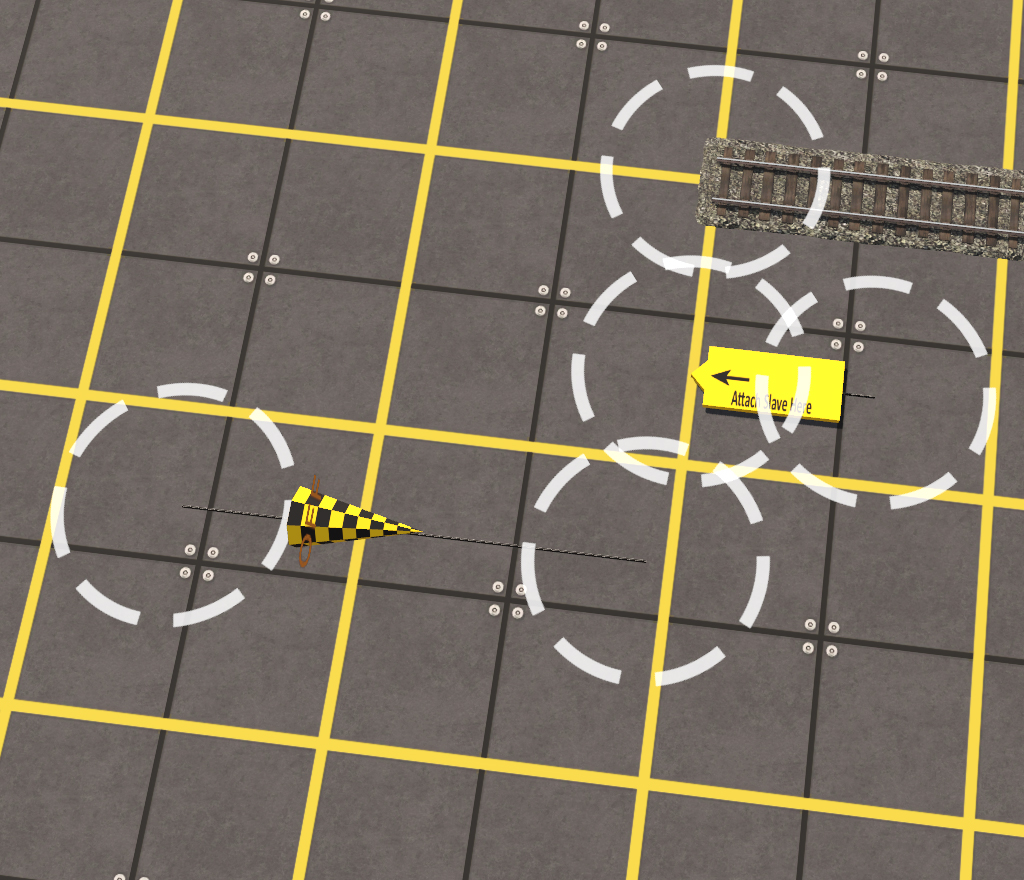
Finally we need to place the ATLS Triggers.
Please note: The triggers are “Track Objects”
I recommend the simplified BTC Version.
BTC TWL ATLS Trigger
<kuid2:160942:31277048:1>
boats – ATLS Trigger TRS19
<kuid2:76656:500016:15>
Each set of warning lights will require at least two (2) triggers, one at the entry to the tipple and one at the exit on each track.
I suggest keeping the triggers rather close to the tipple, as shown in the images above.
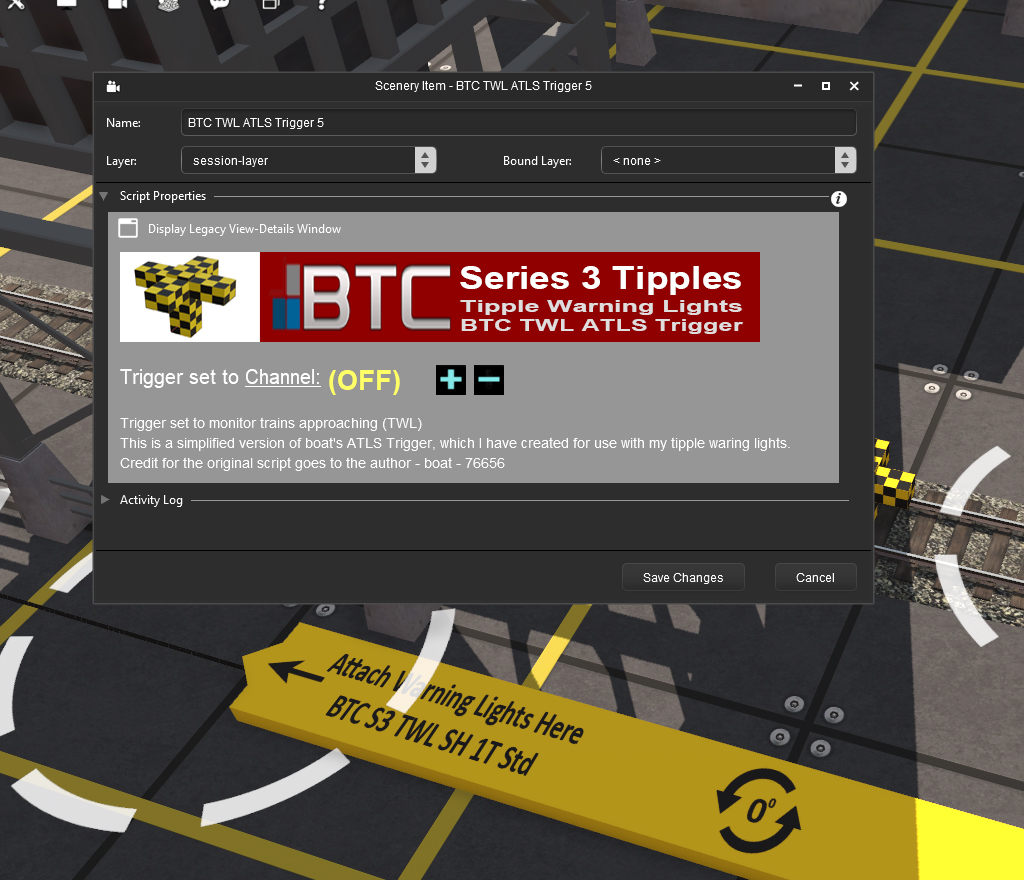
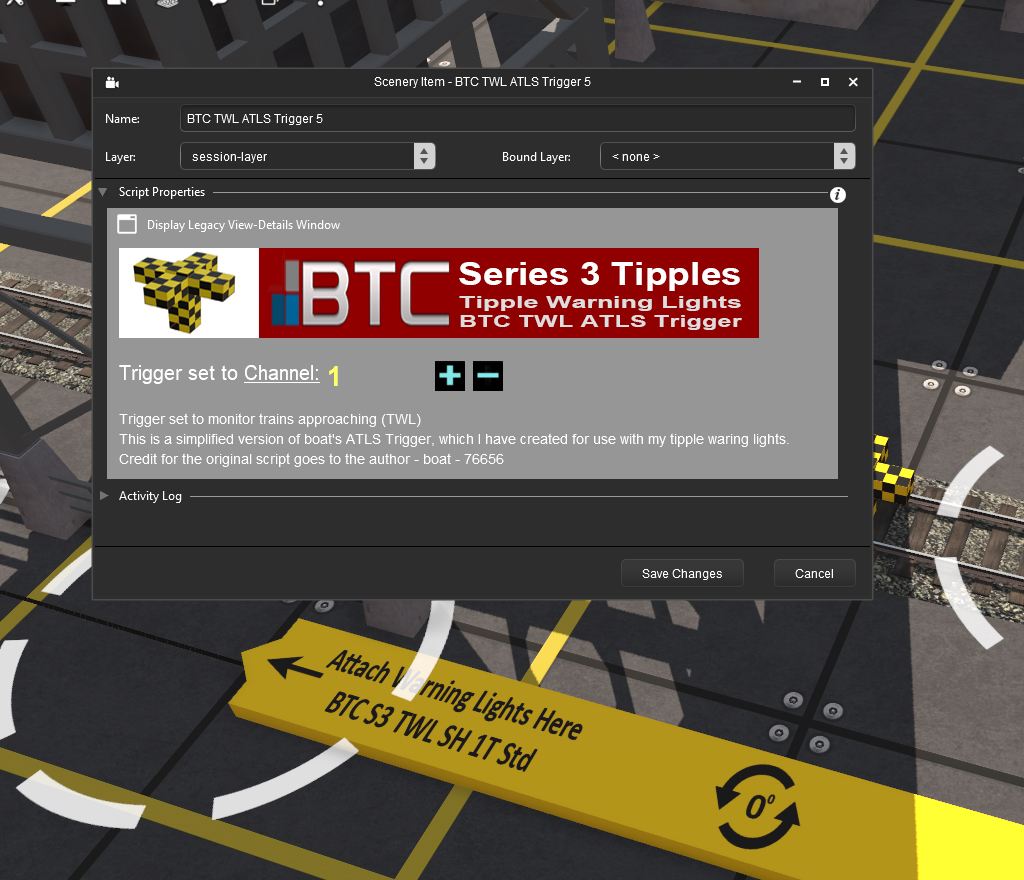
As with the other ATLS assets you need to set a channel for each of the triggers that you use on this set of warning lights.
Use the “Edit details” button to open up the controllers options dialogue panel.
Use the plus sign to select the required channel number, remembering that you need to do this for each trigger separately.
That’s it the tipple warning lights are now set up and ready to test.
There are a few other options that are available when installing these warning lights and I will explain these as well as soon as possible. I will also show how certain tipples require more that one set of warning lights and some require multiple triggers on the same channel.
Download this tutorial in PDF format

0 Comments